This guide includes instructions for completing your code signing order using the Install on Existing HSM method, specifically for the YubiKey 5 FIPS Series. The instructions provided are for Windows only, other operating systems should refer back to Yubico for more information.
This guide also assumes you already own your YubiKey HSM device and are familiar with the associated software. You must own this hardware prior to placing your code signing order. If you are less familiar with hardware security modules, you may wish to instead order a pre-configured certificate token (Token + Shipping method).
The instructions below are provided by Sectigo CA. Please refer back to the specific manufacturer of your hardware security module (HSM) for further instructions, as we cannot provide support for third-party hardware.
YubiKey HSM Attestation Package
YubiKey 5 FIPS Series USB tokens can generate attestation certificates. An attestation certificate will have the same key as the CSR and is signed by the intermediate certificate (this certificate can be downloaded from the HSM). The intermediate certificate in turn is signed by the YubiKey private root certificate.
Note: Please refer to PIV: FIPS 140-2 with YubiKey 5 FIPS Series — YubiKey 5 FIPS Series Technical Manual documentation (yubico.com) for more technical documentation on YubiKey 5 FIPS Series.
Attestation Package Format
This service expects a Base64-encoded PEM certificate chain containing two certificates:
Attestation certificate that matches given CSR.
Intermediate certificate.
Generate CSR
To generate a CSR and attestation certificate for the CSR and get an intermediate attestation certificate from the device:
Note: These instructions are for Windows. If you have a different operating system, see YubiCo for instructions.
1. Plugin your YubiKey 5 FIPS HSM and launch YubiKey Manager. Your YubiKey 5 FIPS device should be displayed in the Manager window.

2. Navigate to Applications > PIV and click Configure Certificates.


3. Select Authentication (Slot 9a) (for EV code signing certificates) and click Generate.


4. Select Certificate Signing Request (CSR) and click Next.

5. Select an algorithm from the drop-down menu and click Next.
Note: Select ECCP256 or ECCP384 for EV Code Signing Certificates as YubiKey supports only ECC algorithms for EV Code Signing. Please do not select RSA2048.

6. Enter a Subject Name for the certificate and click Next. In the example below the subject name is set as Sectigo, but please make sure to use the name of your own organization or individual name here.

7. Confirm the details shown and click Generate.

8. Select a directory and enter a recognizable file name to save the CSR so you may locate it later. This file will be pasted into the CSR field on your Code Signing order form.

9. (Optional) Enter your YubiKey's management key, or check Use Default, and click OK.
Default Key: 010203040506070801020304050607080102030405060708

10. (Optional) Enter your YubiKey PIN and click OK.
Default PIN: 123456

Generate Attestation
Every YubiKey is equipped with a pre-loaded private key and certificate provided by Yubico. This enables you to generate an attestation certificate, which serves to validate that a private key has indeed been generated on a YubiKey. To perform this operation, you will need to utilize the command line interface using PowerShell.
1. Open a Power Shell Window as Administrator. Disclaimer: Our support team is unable to troubleshoot errors in Windows PowerShell.
2. Change directory to YubiKey directory:
Windows
cd 'C:\Program Files\Yubico\YubiKey Manager\'
MacOS
cd/Applications/Yubikey/Manager.app/Contents/MacOS
Linux (Ubuntu), the ykman command should already be installed in your PATH, so there is no need to perform this step.
3. Execute the following command to create the attestation certificate:
Keep in mind:
- You must specify a directory and file name over the placeholder ATTESTATION-FILENAME.crt - for example, to save the file in your Documents, overwrite ATTESTATION-FILENAME.crt with the directory: C:\Documents\Attestation.crt
- If you used slot 9c, replace 9a with 9c
Windows:
.\ykman.exe piv keys attest 9a ATTESTATION-FILENAME.crt
MacOS:
/ykman piv keys attest 9a ATTESTATION-FILENAME.crt
Linux (Ubuntu):
ykman piv keys attest 9a ATTESTATION-FILENAME.crt
4. To proceed, utilize the ykman command to export the intermediate certificate from slot f9 of the YubiKey. Again, make sure to replace INTERMEDIATE-FILENAME.crt with the full directory path and filename you want to use.
Windows:
.\ykman.exe piv certificates export f9 INTERMEDIATE-FILENAME.crt
MacOS:
./ykman piv certificates export f9 INTERMEDIATE-FILENAME.crt
Linux (Ubuntu):
ykman piv certificates export f9 INTERMEDIATE-FILENAME.crt
5. Merge the attestation and intermediate files into one using a text editor such as Notepad. You can open the .crt files in a text editor and copy/paste the full text. The attestation CSR should be first, followed by the intermediate.
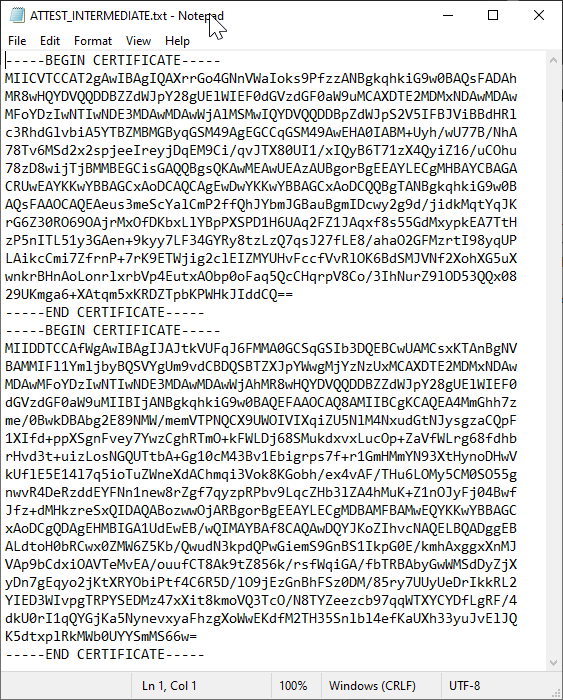
Save this text file and upload on your certificate order form to complete enrollment.
Common Errors
ErroCode:-129 <br/>ErrorMessage:service response: invalid attestation chain: expecting 2 certificates but got 1.
This error can occur if your attestation bundle does not include the intermediate file. Make sure your attestation bundle includes the attestation certificate followed by the intermediate certificate, in that order.
ErroCode:-129 <br/>ErrorMessage:service response: failed to verify that csr public key matches public key in the attestation certificate.
This error can occur if the attestation certificate does not match the CSR submitted on the order form. You may have submitted a different CSR file than the one that generated the attestation. In this case, you may need to start over from the CSR generation step and create a new attestation package.
This error can also occur if the Intermediate certificate file is ordered first in the attestation bundle, or if the bundle contains only the Intermediate with no attestation certificate. Make sure your bundle includes the attestation certificate followed by the intermediate certificate as in the example above.
ErroCode:-129 <br/>ErrorMessage:service response: failed to parse attestation as a valid pem certificate chain.
This error can occur if the correct attestation certificate is not included in the bundle file. Please make sure you do not use the CSR file generated in YubiKey manager in place of the attestation certificate. You must generate the attestation certificate in your command line interface.
ErroCode-129 <br/>ErrorMessage service response failed to confirm that device is fips certified
This error means your YubiKey HSM device is not FIPS-compliant and cannot be used for code signing. You need a device from the YubiKey 5 FIPS series to install code signing certificates. If your device does not include FIPS in the model name, it will not work. You can confirm the model name of your YubiKey device on the home page of YubiKey manager.
Find YubiKey 5 FIPS compliant devices on YubiKey's website.